Introduction
When a user clicks on your website link, their device sends a request to your web hosting server. If your server is located in Texas and your visitor is browsing from London, that data packet has to travel thousands of miles across physical undersea cables. This physical distance creates an immediate loading delay known as latency.
Content Delivery Networks (CDNs) solve this physical barrier by distributing copies of your website across a global network of servers. In this optimization guide, we will break down how CDN utilities route user traffic and explain how to deploy one for free on your site.
The Network Engineering Behind Content Delivery
A CDN acts as an intermediary caching layer between your primary hosting origin and the end-user. The technology relies on three key components:
1. Points of Presence (PoPs)
PoPs are physical data centers located globally. Each data center houses specialized caching servers that maintain synchronized duplicates of your website’s static files, such as your theme styles, images, and scripts.
2. Anycast Routing Systems
Traditional domains route all traffic to a single server IP address. CDNs use Anycast routing, which assigns a single IP address to the entire global network. When a user requests your page, the network automatically points them to the geographically closest server node, slashing travel times.
3. Edge Server Caching
By keeping copies of your digital assets right at the network “edge,” your primary host server doesn’t have to handle minor requests. This reduces your hosting bandwidth consumption and keeps your server responsive during heavy traffic surges.
Also Read: How to Configure Browser Caching Utilities to Lower Server Response Times
Step-by-Step Guide to Deploying a Cloudflare CDN Utility
You do not need an enterprise budget to set up global content delivery. Cloudflare provides a powerful, industry-standard CDN network completely free for small websites.
Step 1: Initialize Your Domain Configuration
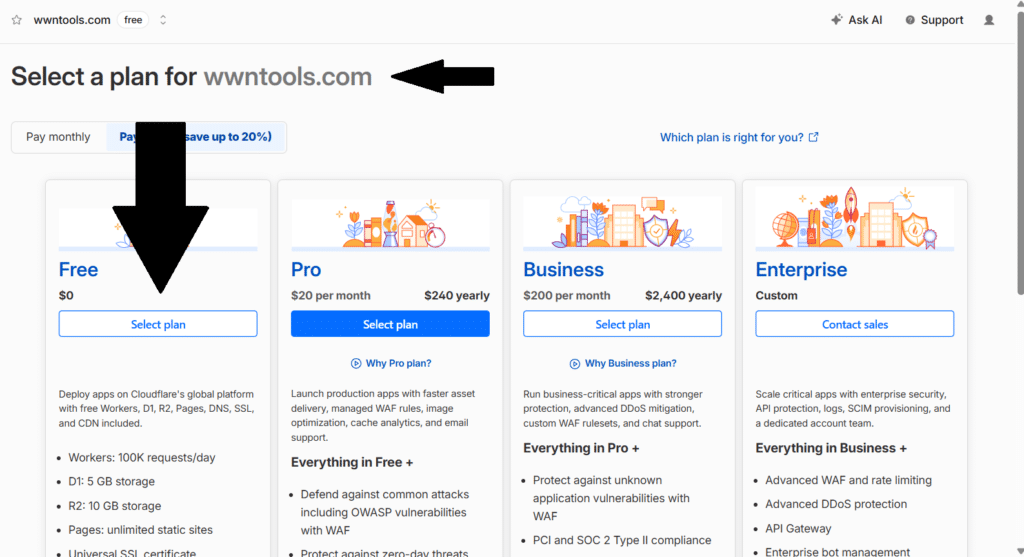
Navigate to the official Cloudflare dashboard and create a free account. Type your root domain wwntools.com into the setup wizard and select the free tier plan. Cloudflare will automatically scan and clone your existing DNS zone file records.
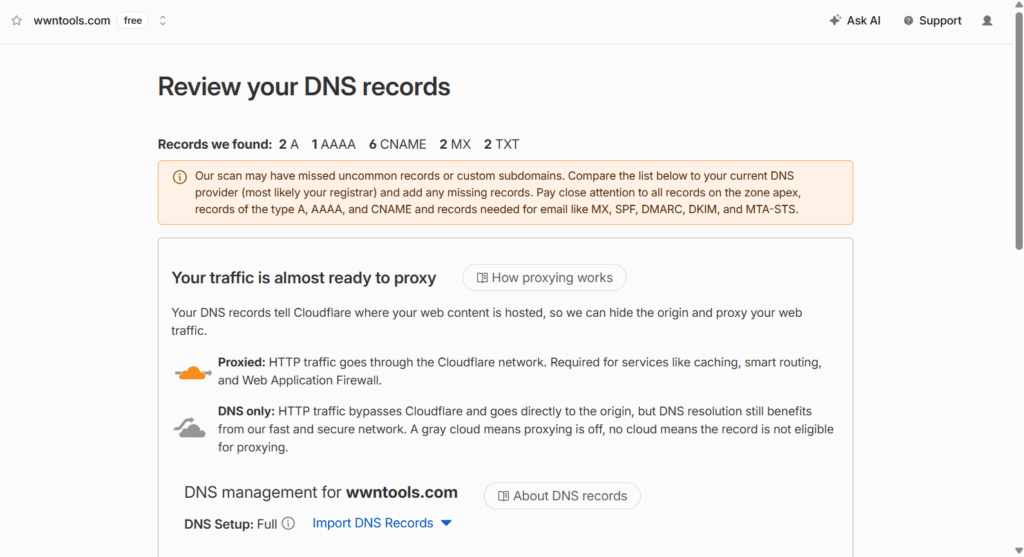
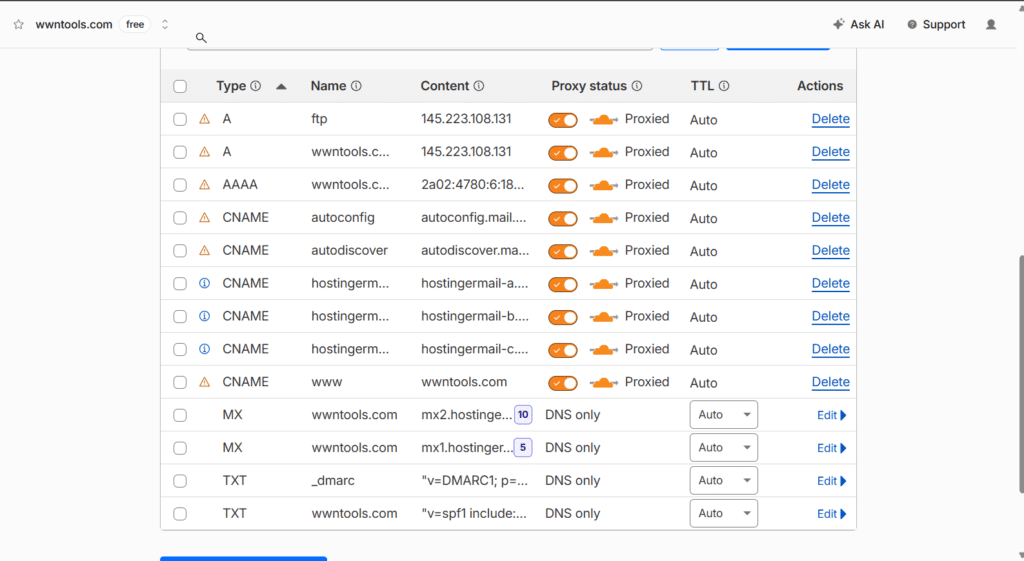
Step 2: Update Your Server Nameservers
To let the network filter and distribute your web traffic, you must point your domain nameservers toward the CDN nodes.
- Log into your domain registrar account where you purchased your name.
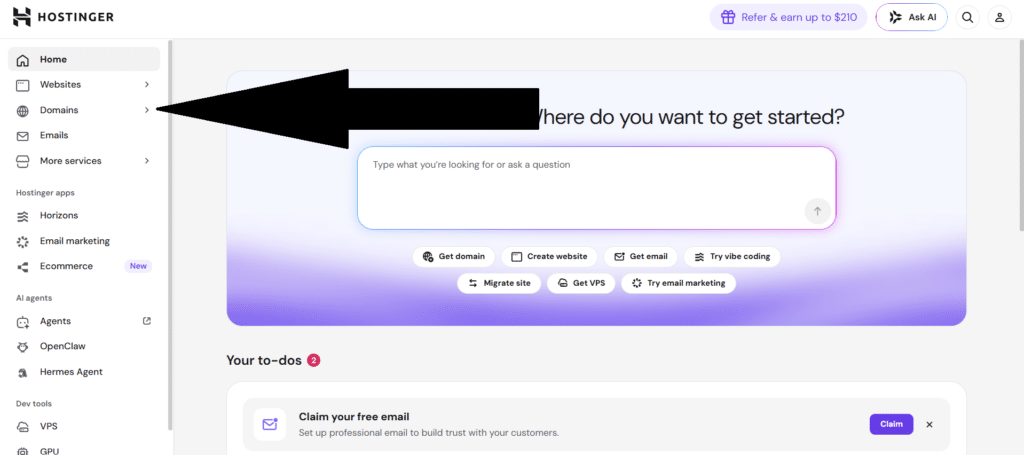
- Locate your active Custom DNS or Nameserver management panel.
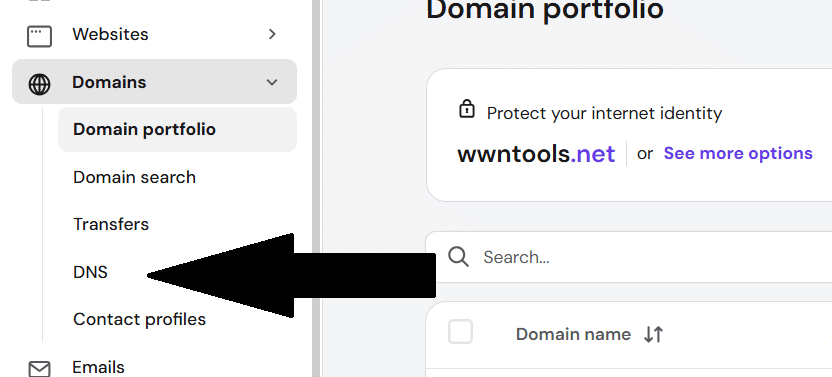
- Replace your registrar’s default nameservers with the two unique server addresses provided by Cloudflare.
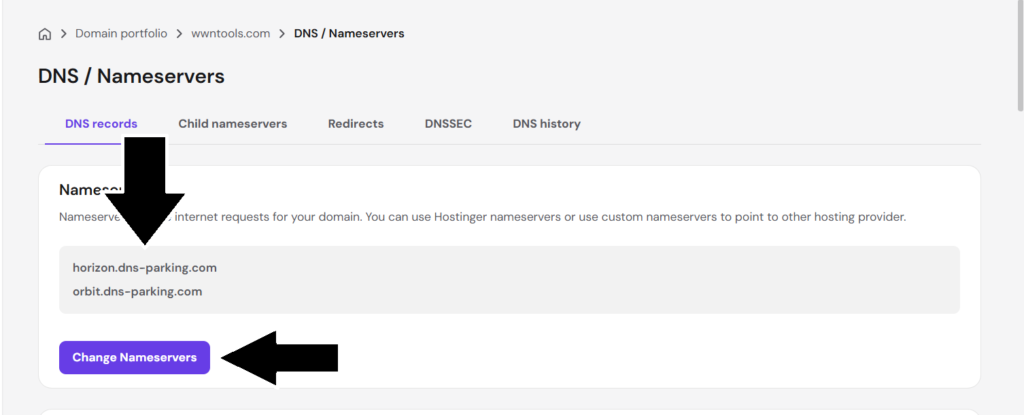
- Hit save and allow up to 24 hours for global DNS propagation to finalize.
Step 3: Configure Basic Edge Rules
Once your nameserver updates go live, access your CDN optimization panel to toggle on core performance filters:
- Auto Minify: Check the boxes for HTML, CSS, and JavaScript. This strips out empty line spaces from your source files automatically, making them lighter.
- Brotli Compression: Enable Brotli data encoding to compress file transfers even tighter than standard Gzip setups.
Conclusion
Physical distance shouldn’t dictate how fast your website loads for international users. By routing your domain through global content delivery networks, you drastically cut down loading delays and protect your web hosting server from unnecessary stress. Configure a free CDN account today to provide an instant speed boost for your worldwide readers.